Selenium stands out as the predominant tool for end-to-end automation testing, enjoying widespread popularity. It accommodates a variety of widely-used programming languages such as C#, Java, Python, JavaScript, and more. The trio of C#, Selenium, and NUnit stands as the most commonly employed combination for conducting end-to-end automation tests.
To setup Selenium C# with Visual Studio, just follow the steps below:
- Create NUnit Project
- Add Selenium libraries
Step 1 : Open Visual Studio
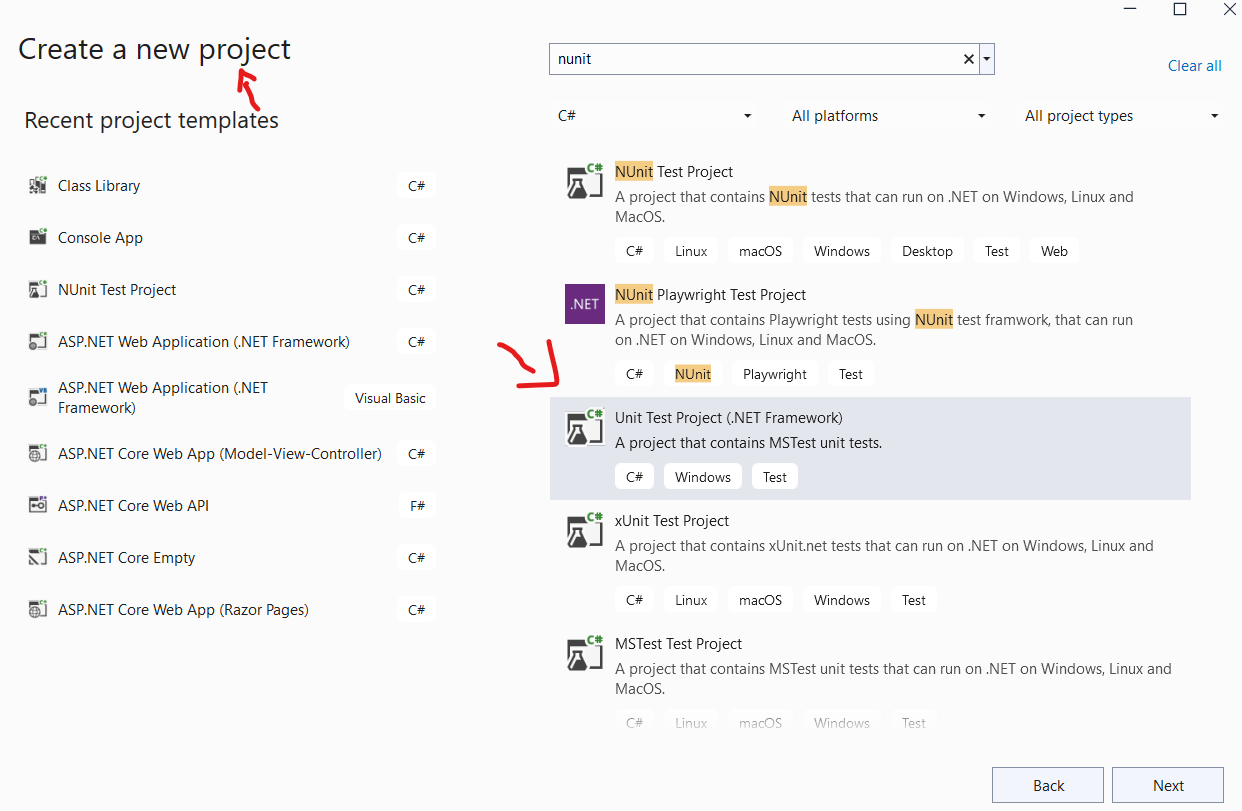
Step 2 :Click on Create NUnit Project, which emerges from the Create New Project pop-up. Look for NUnit Project with .Net Core. Click on Next.
Step 3 : Give a name to project and make sure the location to the project files. Then Click Next
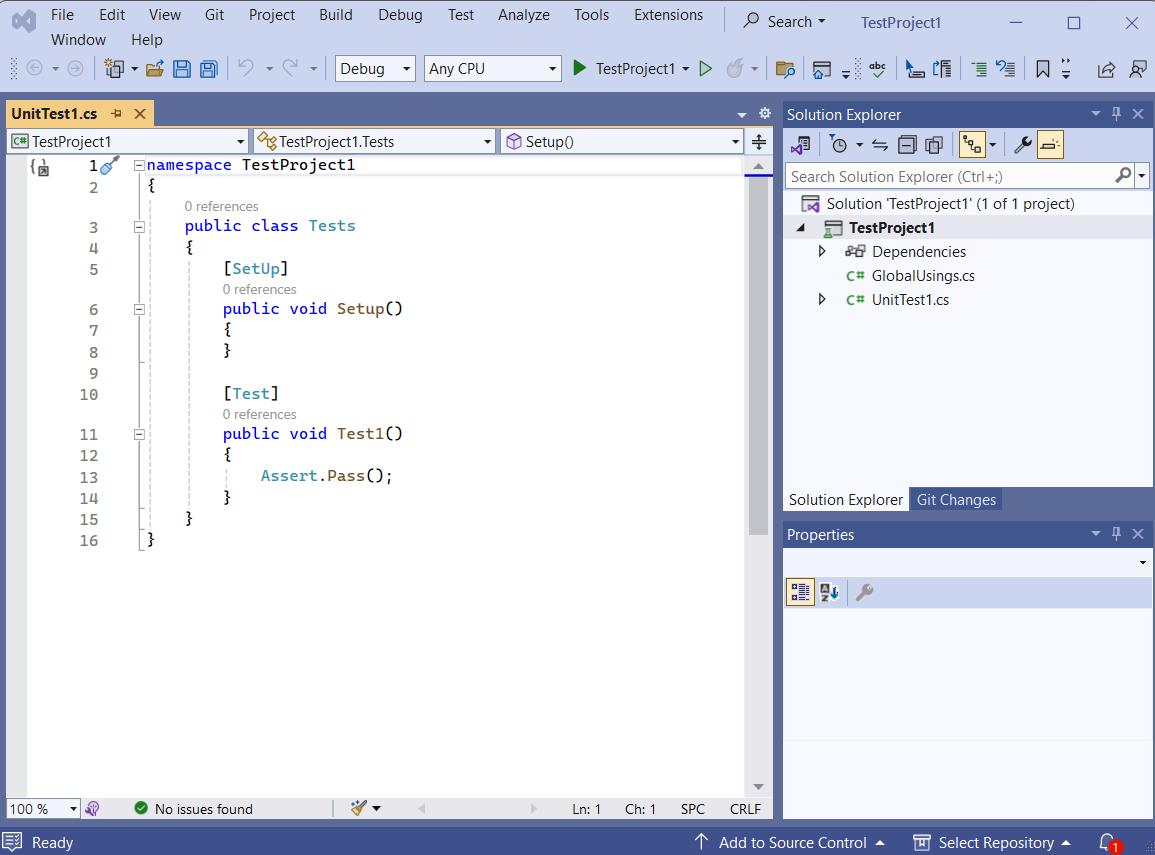

Finally you will see a interface as below.
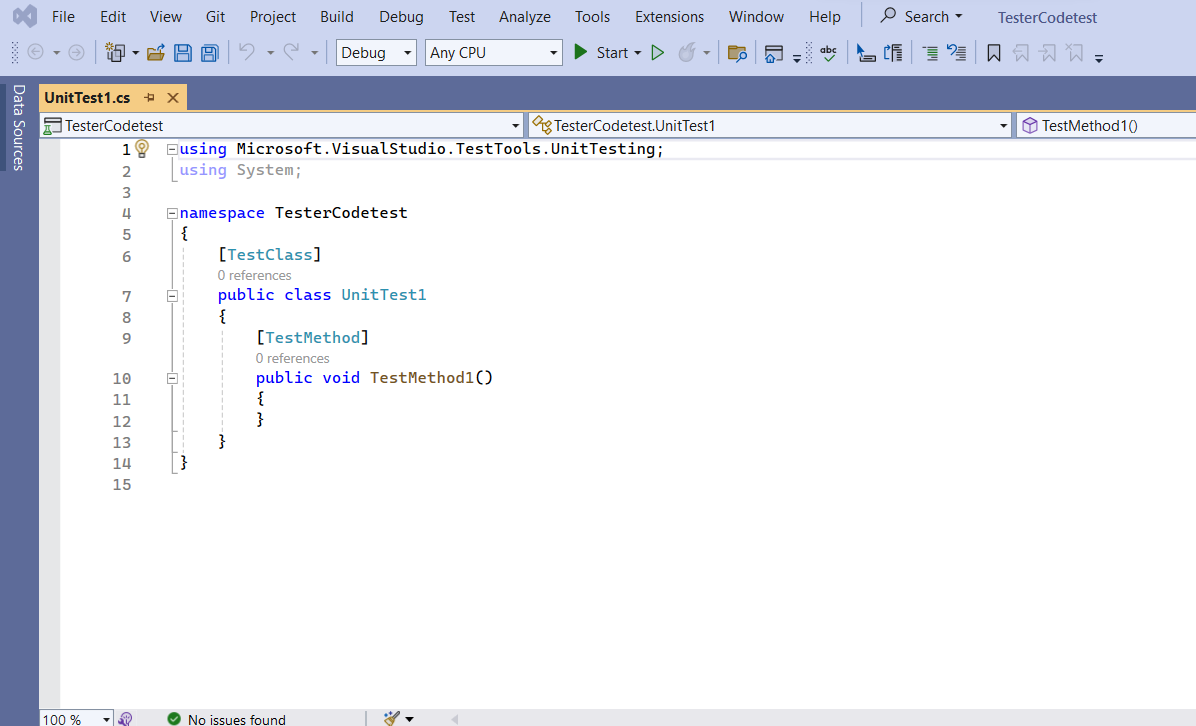

Now the basic setup is complete for our new project with nUnit. We need to Setup Selenium libraries and drivers as per the next step.
Add Selenium Libraries and Drivers
To initiate End-to-End testing automation with C# and NUnit, follow these steps to integrate Selenium libraries and browser-specific drivers into your project:
Step 1: Add Selenium Webdriver NuGet Package
a. Open the Visual Studio Tools menu.
b. Navigate to NuGet Package Manager and select “Manage NuGet Packages for Solution.”
c. The NuGet Solution Window will open.
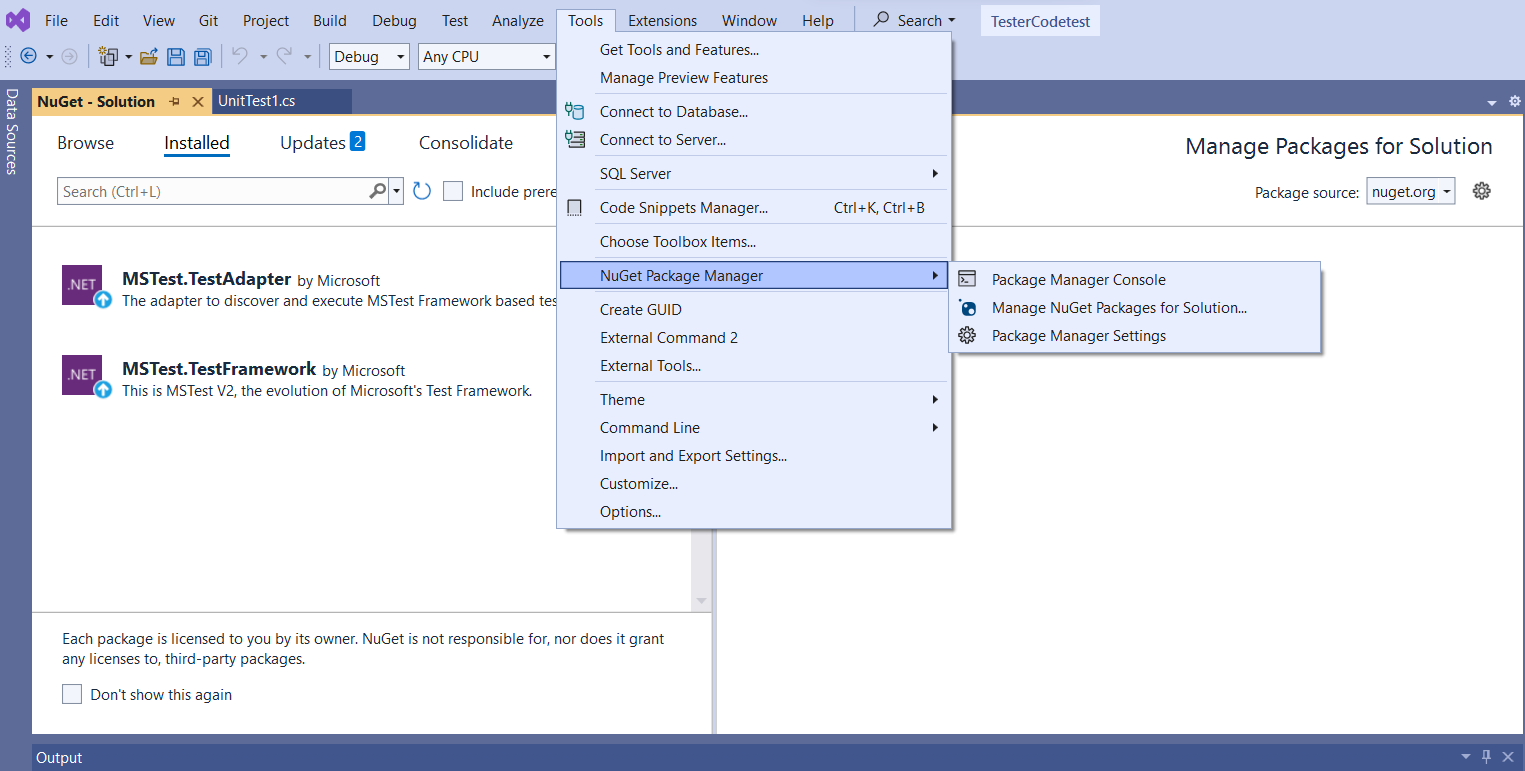

Step 2: Install Selenium Webdriver for the Project
a. Inside the NuGet Solution window, locate and choose the Selenium Webdriver package and Selenium Support Library.
b. Click on the “Install” button for both libraries.
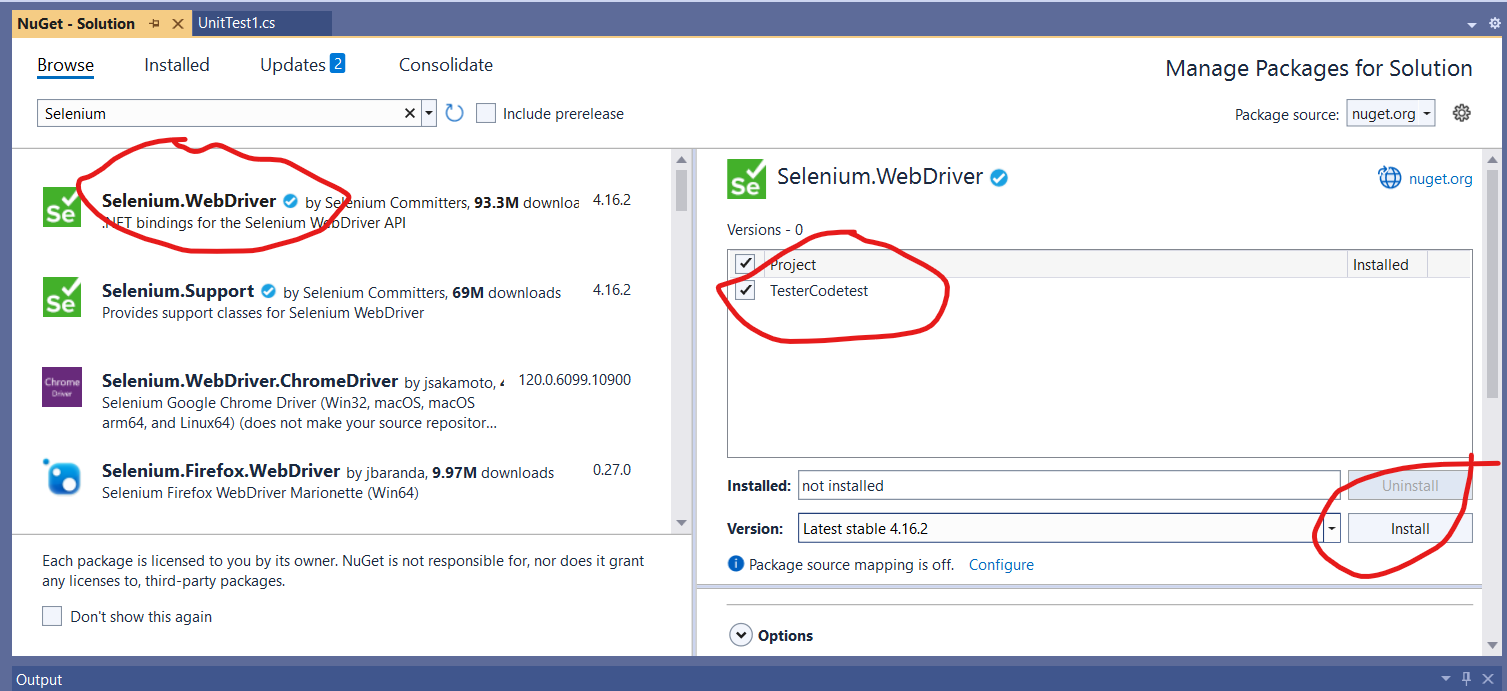

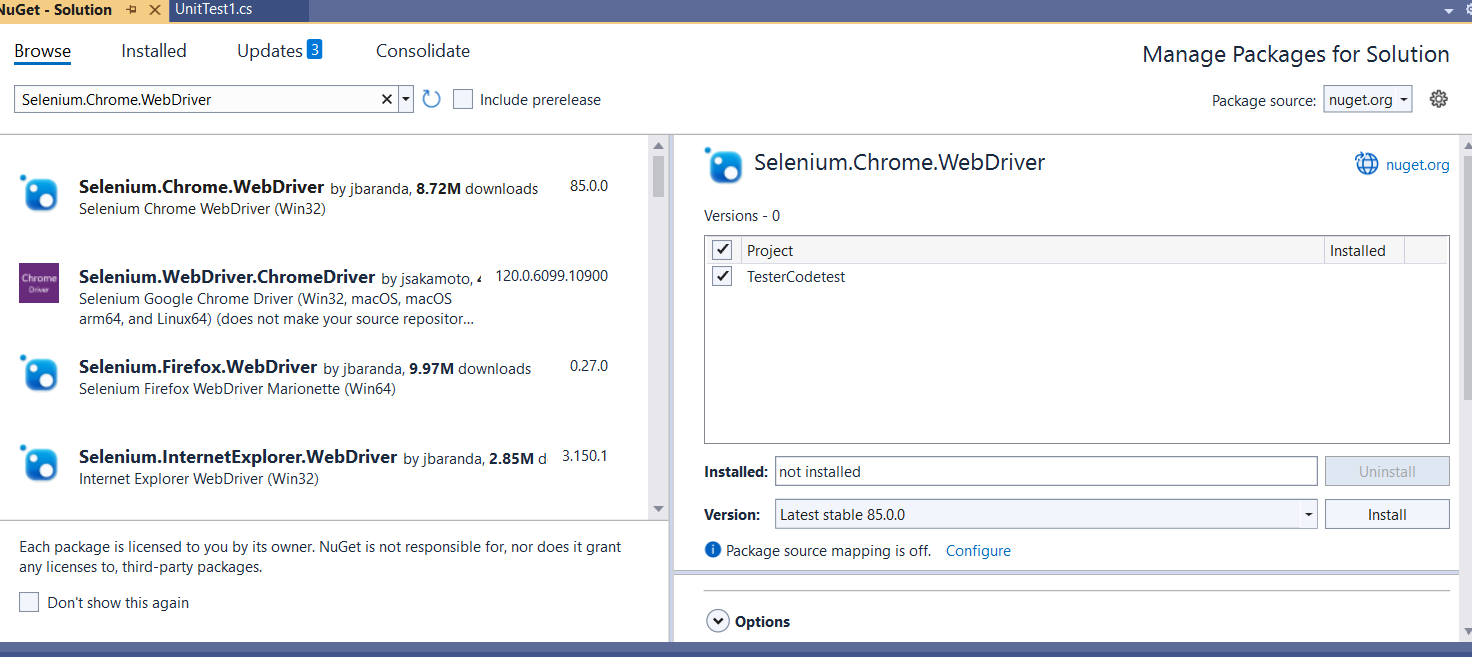
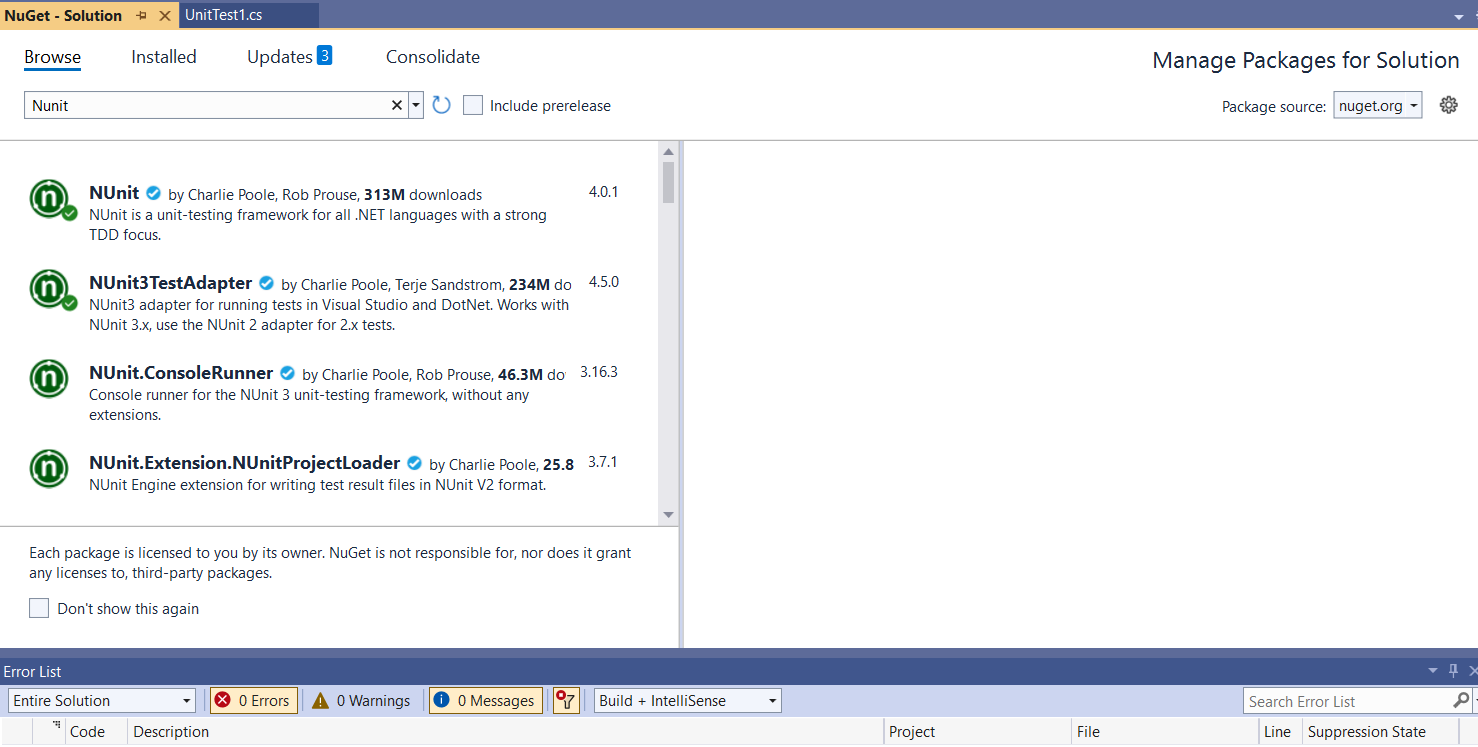
c. Now you have installed selenium web drivers. Then you need Install Selenium.Chrome.WebDriver , NUnit and NUnit3TestAdapter same way.
Selenium.Chrome.WebDriver

Nunit and NUnit3TestAdapter

Now we have all in one setup. We can start coding now.

